Sunday, November 7, 2010

Bolero Jacket I Yi Yi Yi!

I purchased this jacket without the benefit of my reading glasses. So when I got home I realized it was a small and might not fit as well as I had hoped. It seemed big enough when I held it up against me at the yard sale....clearly I would never eyeball an outfit at Nordstroms! Anyway, I am the 'possibilities/opportunities' girl so let's see what I can do with what I got!
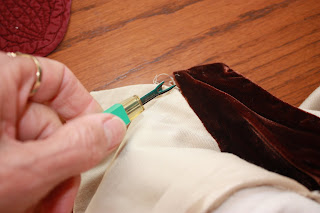
First on the agenda - trim the lining out of the jacket to give it some wiggle room.


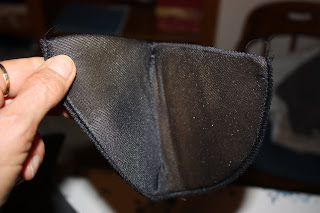
Then it was time to say hasta la vista to the humongous shoulder pads. That alone will give me the shoulder room I sorely needed.


Now the collar was getting the boot as well. It reminded me of the dresses I used to wear to dancing school in 4th grade. Velveteen numbers. Too much like the Beatles jackets.

The sleeves got chopped as I was going for the matador look, not car coat. I hemmed the seams so they would be clean and pristine.
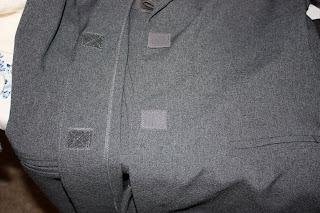
I also took the coat up about 6 inches and hemmed it as well. Had to sew the pockets since they were now shallow versions of their former selves.

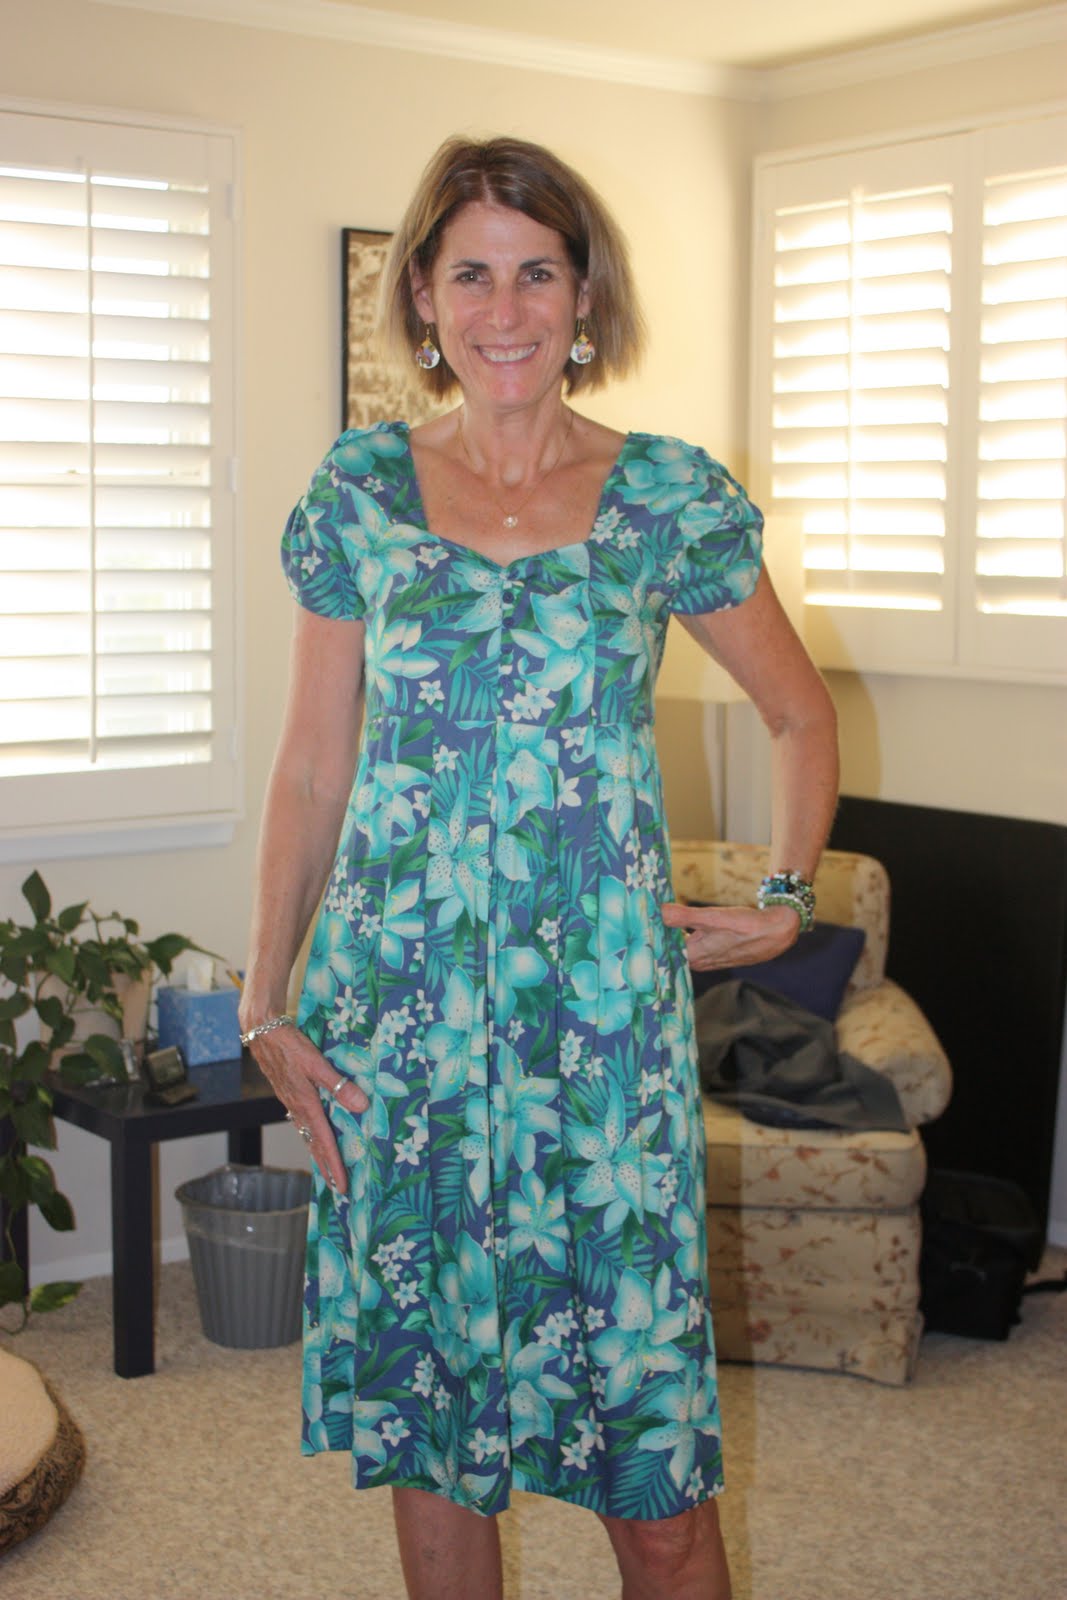
I folded the front collar to make it into a v-shape and topstitched it for effect. I moved the buttons over to the other side to hide the button holes and then sewed a tiny hook and eye to use as a closure for the newly fashioned jacket. I thought this is such a great Southern California type jacket - light enough to wear with a tank top and warm enough for our cooler evenings.

Remember the scarf I dyed a few posts back? How do you think it looks paired with my bolero???

Saturday, November 6, 2010

To Dye For

I bought this lacey/jackety/coverall/wrap creature specifically for the delicate lace possibilities. I knew I'd never wear this for a plethora (I love this word) of reasons~size, color, faded and torn seams, fashion style. However all that said, I was sure that some day soon the lace remnant would come in mighty handy and I wanted to be ready!
I cut the piece into three sections to ready it for the dye action-to-be. I wanted to dye it black as I had an idea how I would use one of the sleeves.
I readied the big pot of hot water with a box of Rit black dye and gently dropped in each lacey pretty piece. I also decided to make this scarf into a darker color as I already had a teal scarf from the last dye session.


After a half hour soak in the dye and a quick trip through the washer, I was ready to use the lace. I had purchased this pretty asian looking top at a local sale ($3.00 no less, over budget!). It was so so swanky but a tad too deep in the cleavage area for my taste. Time to rectify this!


I took the sleeve piece and cut it open, laid it over the v-neck front of the blouse and got to sewing it in place. Love the finished product! Still feminine and a peekaboo feel to it. And the scarf came out quite mysterious looking - the flowers still pop out but the grayish tinge looks musty and fall-like.
Jacket makeover in the next post!!


Friday, November 5, 2010

Rit Dye Parade

Still a fervent follower of Marissa Lynch and her wonderful website http://www.newdressaday.com/, I thought I'd get brave and try some of her dye-ing techniques. My first experiment was with this lacy number I purchased for the grand price of $.50 at a Sunday yard sale. The dye-ing is a learning process for me so I figure if I make any huge mistakes, I am only out 50 cents and can keep practicing until I get it right.

There were several stains throughout the blouse as well though I hoped that transforming the color would take care of them pronto. The color of this was blech against my skin but I was enamored with the lacy details on the sleeves and collar area. The fabric was delicate so I anticipated the new color would spell MAGIC!

I threw this scarf in the dye vat as well to make a matching set of teal loveliness!!


I soaked the blouse and scarf for an hour, let the dye have a chance to set and then washed them both. I LOVED how the lace details pop out on the front and sleeve area too. Couldn't wait to partner this with a tank.

Here we go with the pink and teal again. Reminds me of my favorite flavors of ice cream, chip mint and peppermint. Yummylicious.
The scarf is now super teal like and the flowers are still very evident. My dye-courage is getting stronger by the minute.


Thursday, November 4, 2010

House Dress BeGone!

I adored the colors in this dress. Pink and teal, 2 of my favorite combo colors. When I put the dress on I had flashbacks of Donna Reed Show and June Cleaver in Leave it to Beaver sans the pearls. I may have grown up watching these shows but I wasn't about to date myself fashion wise. So the make over begins.
The dress was actually my size so just a few minor adjustments were needed to bring it to super star status. I took the clothe belt out and snipped the belt loops. Then I simply folded the collar inside and made the front v-neck friendly. I top stitched
over the collar area to make it stay flat. The sleeves had to go too so I seam ripped them off and resewed the seam to stay put.

I added my favorite Daisy Fuentes gray cardigan and now am ready for Spring. Of course I realize that is months away but I can always daydream about daylight savings and fields of wildflowers, can't I?

Wednesday, November 3, 2010

My Blue Heaven

Whippoorwills call, evenin' is nigh~Hurry to my blue heaven~
Turn to the right, there's a little white light~Will lead you to my blue heaven
There is a crispness in the air that whispers long sleeves, wear long sleeves....Luckily I came upon this stunner at a school rummage sale. I think it might have been a man's shirt based on the position of the buttons. Why ever do men and women need to have their button action on opposite sides I will never understand. Silliness, pure silliness.

I loved the print pattern on this shirt and with a bit of tweakage I can make this more sleek and girlie-like.
I pinned the sleeves and sides to bring them in for a more fitted feel and then rolled up the cuffs as the sleeves were hanging down to the ground. I trimmed the excess and we were ready for some modeling action.
This blouse is ready for a jacket and scarf for a dressier look or a simple sweater tank to go casual. Oh and the iron might have it's way with this too....


Tuesday, November 2, 2010

Aloha Nui Oi

Everything about this dress beckoned for a tropical vacation. Gorgeous floral print, long flow-y muumuu business, sweet front full of delicate buttons, good sleeve potential. Don't need or like the strap action but had some ideas floating in my WISH-I-WAS-HAWAII-BOUND head of mine.
I opened the front seam a bit to give the bodice a little more room, then cinched the top right up to the buttons for flair appeal. Sewed down the seam to give it a permanent finish and got to work on the sleeves.
Remember the side straps? I decided to create a kind of tulip effect in the sleeve area. I twisted one strap and pinned it to the sleeve, scooping and gathering and reattaching the other end of the strap to the inside of the sleeve. Hard to explain so I'll let the picture do the talking! It made a drape-y effect that I ended up really liking.

I hemmed it a few inches to reduce the muumuuness and now it is cute as cute can be. Here I added a navy belt that I had in my closet and now I am ready to be wooed by a handsome ukulele player, sipping virgin mai tais and watching surfers off of Waikiki. Join me?

Monday, November 1, 2010

Recreation = Re-Creation


As I was perusing a fashion magazine late last week, I saw the idea of turning a suit jacket into a vest. With this in mind I went scouting yards sales for a conservative gray or black suit jacket, preferably my size or close to it to avoid major altering.

BINGO! This jacket was snatched at a huge church rummage sale. BTW rummage sales are my faves as there are typically racks and racks of clothes to choose from.

Let's go to town on this!


Of course there were the standard shoulder pads to contend with. I wonder if these will someday come back in style. Maybe I should save them all just in case. LOL.
Now it was time to take the trusty seam ripper and remove the sleeves. Super easy going. Once they were both off, I sewed the sleeve seams secure and that's it!

This jacket had the extra bonus of NO BUTTONS! Which of course means no button holes to contend with. The velcro closures were so easy to remove with nary a trace left behind.

This will be so cute with a long sleeved t-shirt, a colorful tank top, add a belt and we are Project Runway ready. Hey, a girl can dream, can't she?